Here's this week's Flashback Friday where I dig up an old post. If you haven't seen it before, then it's new to you! In honor of the newest addition to my family, I'm highlighting a simple, baby-related sewing project.
Skill Level: Beginner
Skill Level: Beginner
Skills Attained: Pressing and Straight Stitch Sewing
 |
| Embellished Burp Cloth |
- Sewing machine
- Scissors (or rotary cutter and mat)
- Plain burp cloths/cloth diapers (Gerber and Dundee both make plain white cloths with three panels)
- Coordinating thread
- Decorative fabric
Have you ever walked through a store, saw something that you really liked, and thought, "I could totally make that"? I had that thought when I received an adorably embellished burp cloth as a baby shower gift. So, this week, I will show you how to embellish a burp cloth using a plain, three-fold cloth diaper and some decorative fabric. This is a straight-forward, simple sewing project that requires minimal supplies, yet the finished product has that extra pizazz sure to impress.
Embellishing an existing product is a great way to get your feet wet in the world of sewing. You don't have to start from scratch, and the most difficult steps are behind you. Rather, you can focus on your creative side and turn a blasé item into something unique with your own style. So, let's get started!
![]()

1. Measure the center panel of your burp cloth, and cut your fabric 1" longer and 1" wider than the size of the center panel. In this example, I used Dundee burp cloths, so the center panel measures 21" by 4", so I cut my decorative fabric 22" by 5".
 |
| Cut decorative fabric 1" wider and 1" longer than the center panel of burp cloth |
2. Lay the fabric wrong-side up on the ironing board and press over each edge 1/2 inch. Press the fabric on all four sides.
 |
| Press over 1/2" on all four sides |
3. Pin the fabric on the center panel of the burp cloth. Place pins approximately every 3 - 4 inches to secure the fabric.
 |
| Place pins ever 3 - 4" to secure fabric |
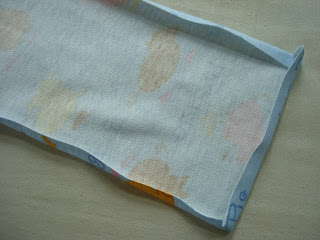
4. Sew a straight stitch around all the edges of the fabric to secure the fabric on the burp cloth. When you reach each corner, place the needle in the down position before you pivot the fabric to begin sewing on the next edge to ensure a continuous seam. Try to sew as close to the edge of the fabric as possible as this will give the finished burp cloth a more professional look. I used a 1/8" seam allowance (see picture below). Sew around all four sides until you reach the beginning. Remember to use a back-stitch at the beginning and end of your stitching to create a knot.
 |
| Use a 1/8" seam allowance |
Easy as that!
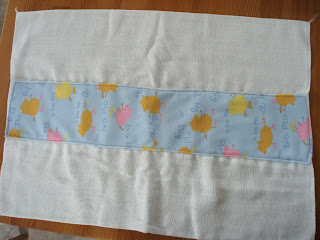 |
Finished Burp Cloth |


